Using DLL
Using ready-made DLLs is familiar to those who want to work continuously in Visual Studio and JetBrains Rider environments. This approach offers several advantages over writing code inside Designer:
- Enhanced code editor compared to the built-in editor inside Designer.
- Recompiling code automatically updates content inside Designer.
- Possibility to split code into several files (in the case of the code approach, only OneFile-OneStrategy variant is possible).
- Using the debugger.
Creating a Project in Visual Studio
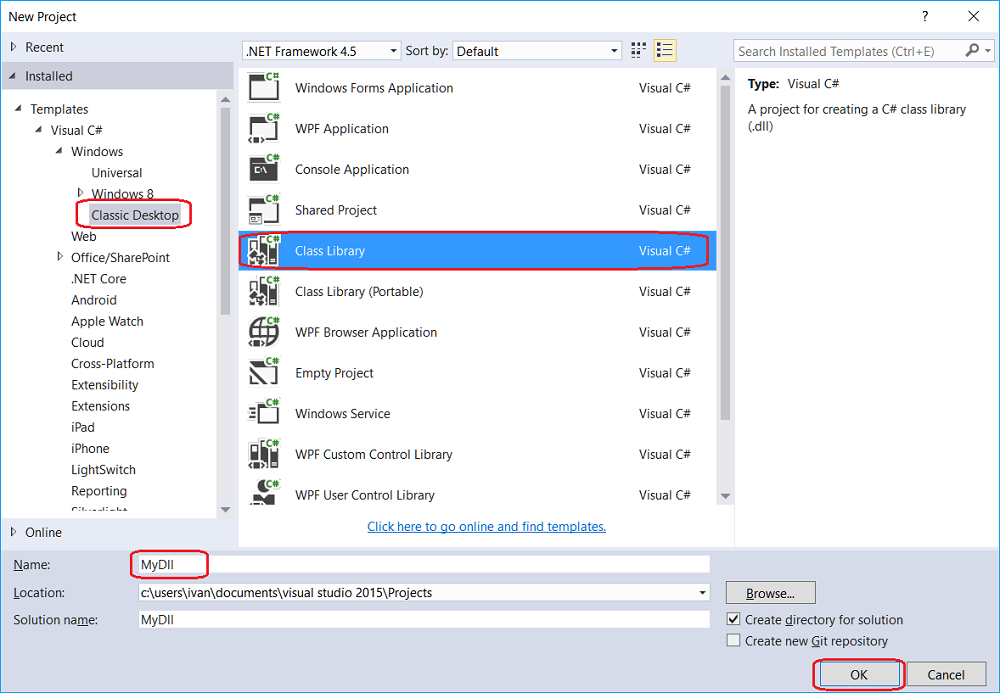
- To create a strategy in Visual Studio, you need to create a project:
- Next, you need to write the strategy code. For a quick start, you can copy the SmaStrategy code, which is created as a template in strategy from code:

- To compile the code, it is necessary to include the NuGet package StockSharp.Algo, where the base class for all strategies Strategy is located:
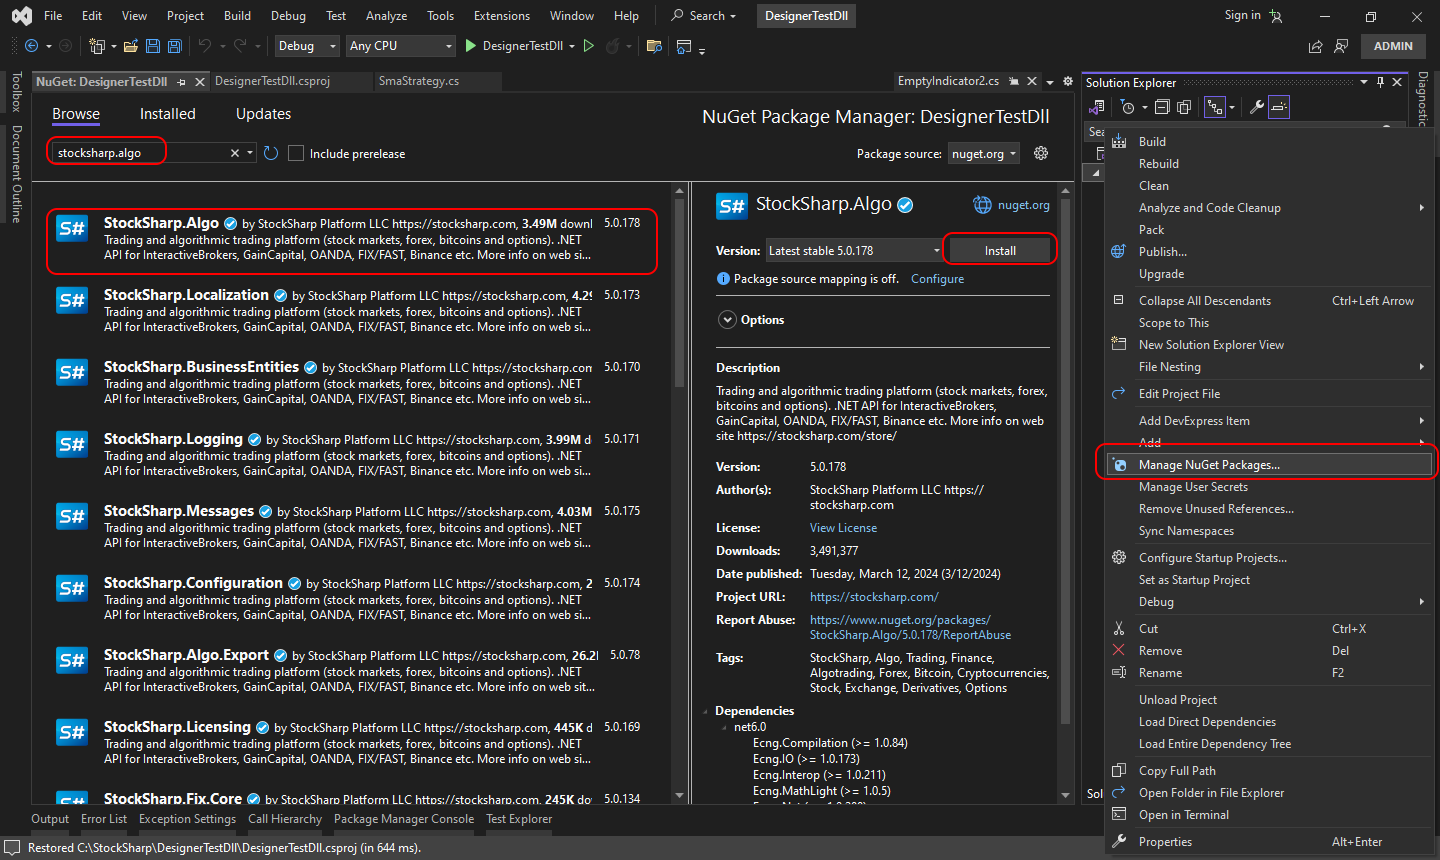
If the strategy uses charting interfaces, it is necessary to include the NuGet package StockSharp.Charting.Interfaces. These interfaces do not contain the logic of the actual chart and are only needed for compiling the code. In the case of launching the strategy in Designer, real data rendering on the chart will occur through these interfaces.
- After creating the strategy, the project needs to be built by pressing Build Solution in the Build tab.

- In Visual Studio by default, the project is built into the …\bin\Debug\net6.0 folder.

Adding DLL to Designer
- Adding a strategy from a DLL is similar to creating a strategy from code. But at the content type definition stage, you need to choose DLL:
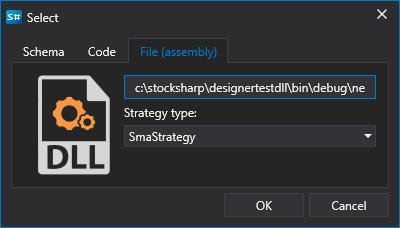
- In the window, you need to specify the path to the assembly (must be compatible with .NET 6.0), and choose the type. The latter is necessary because one DLL can contain several strategies (or cubes with indicators). After clicking OK, the strategy will be added to the Scheme panel and is ready for use:
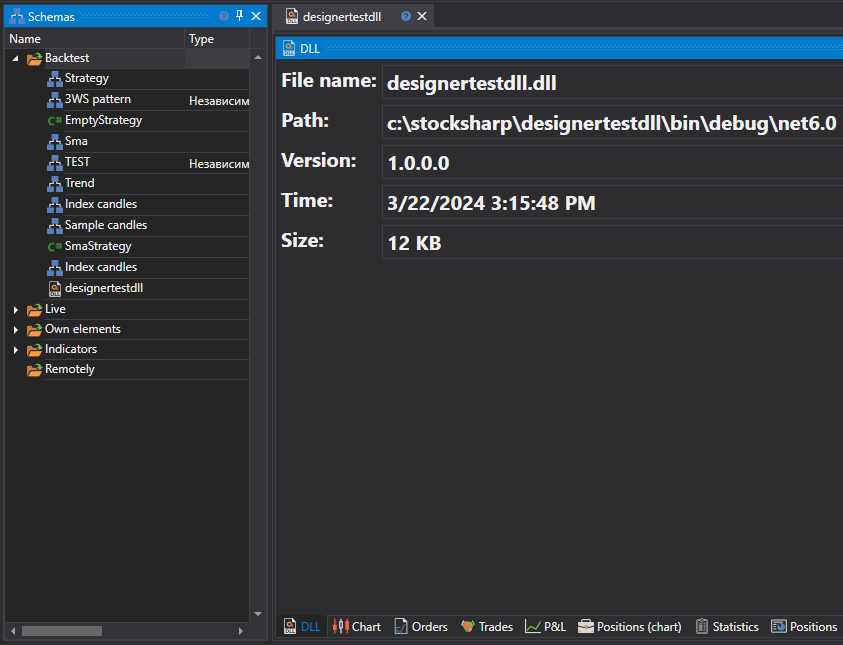
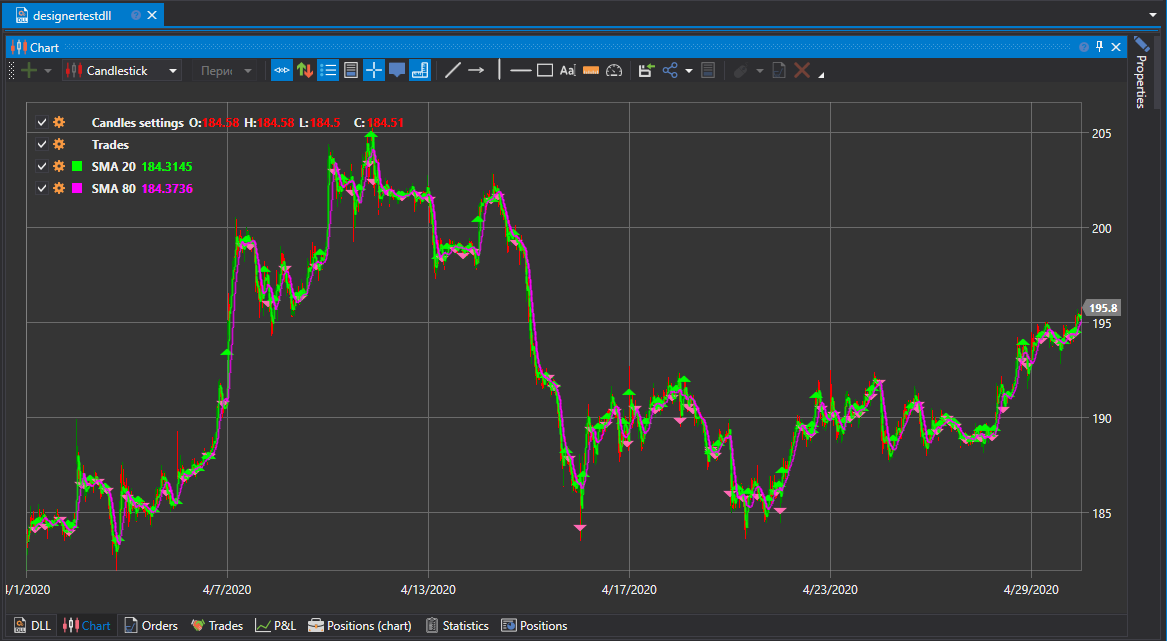
- Launching the strategy on backtest, on live, and other operations - works similarly to strategy from diagrams and code:
