Connections settings
- When clicking the arrow next to the Connect
 button, the Connection settings button appears:
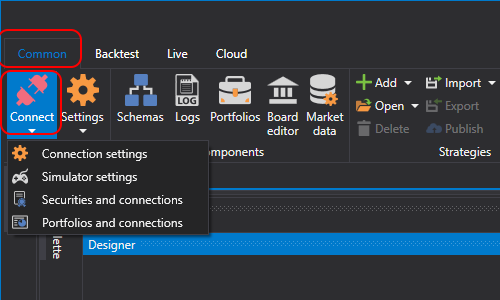
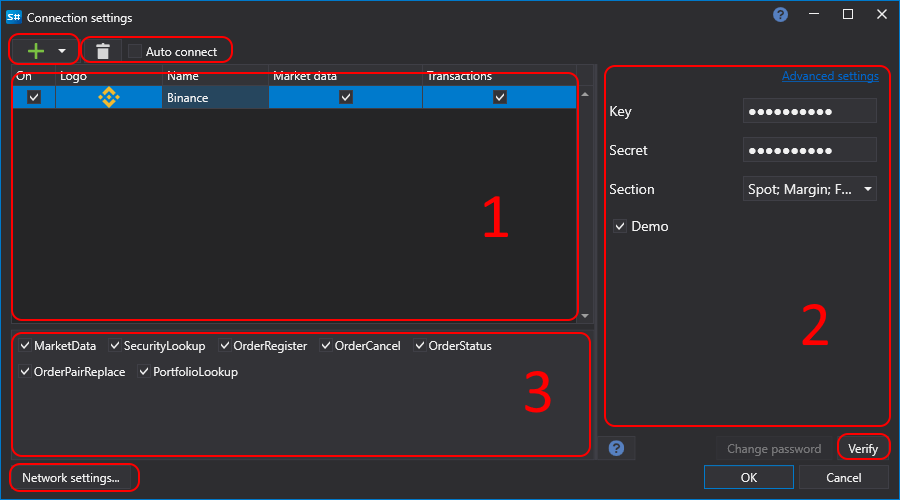
- When clicking the Connection settings button, the Connection settings window opens which is divided into 3 areas:
- Clicking the
 button activates the drop-down list of supported connectors. The selected connectors are displayed in the area No. 1. The
  button removes the selected connector. The first column of the area No. 1 displays whether the connector will connect when you click the Connect
  button or will not connect
  . These values are set using the
  and
and  buttons.
The Market data and Trades fields display whether the connector supports market data and work with orders.
When the Auto-connect check box is selected, the connection automatically connects when Designer starts.
The area No. 2 displays the selected connector settings. When the
 is clicked, the program redirects to the documentation (API) on adjusting the selected connector.
Important
Advanced settings are needed in special cases, and changing them is not recommended.
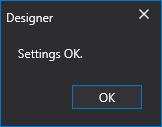
- Clicking the Check button will check the connection of the current connector. If the check fails, a window with an error will appear, describing the reason for the unsuccessful connection. If the check is successful, a window will appear:
The area No. 3 displays data types, which will be received or transmitted by the connector. By clicking the
 /
/  checkbox you can enable/disable transmission or reception for this type of data.
Clicking the Network settings button will open the Proxy-server settings window: