Connectors
For working with exchanges and data sources in S#, it is recommended to use the base class Connector.
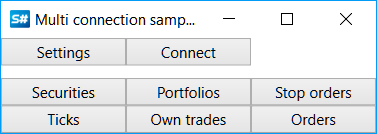
Let's look at working with Connector. The source code of the example can be found in the Samples/01_Basic/01_ConnectAndDownloadInstruments project.
Create an instance of the Connector class:
...
public Connector Connector;
...
public MainWindow()
{
	InitializeComponent();
	Connector = new Connector();
	InitConnector();
}
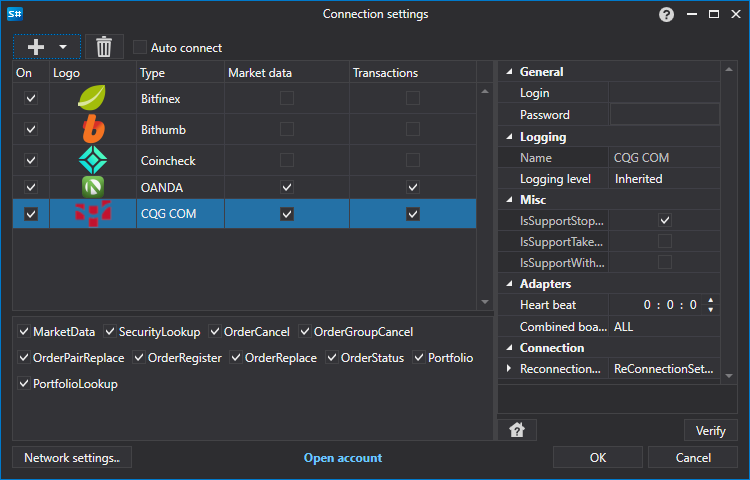
For configuring Connector, the API has a special graphical interface that allows you to configure multiple connections simultaneously. How to use it is described in the section Graphical Configuration.
...
private const string _connectorFile = "ConnectorFile.json";
...
private void Setting_Click(object sender, RoutedEventArgs e)
{
	if (Connector.Configure(this))
	{
		Connector.Save().Serialize(_connectorFile);
	}
}
Similarly, you can add connections directly from code (without graphical windows) by using the extension method TraderHelper.AddAdapter<TAdapter>(StockSharp.Algo.Connector connector, System.Action<TAdapter> init ):
...
// Add adapter for connecting to Binance
connector.AddAdapter<BinanceMessageAdapter>(a =>
{
	a.Key = "<Your API Key>";
	a.Secret = "<Your Secret Key>";
});

// Add RSS for news
connector.AddAdapter<RssMessageAdapter>(a =>
{
	a.Address = "https://news-source.com/feed";
	a.IsEnabled = true;
});
You can add an unlimited number of connections to a single Connector object. Therefore, you can connect to multiple exchanges and brokers simultaneously from the program.
In the InitConnector method, we set the required event handlers for IConnector:
private void InitConnector()
{
	// Subscribe to successful connection event
	Connector.Connected += () =>
	{
		this.GuiAsync(() => ChangeConnectStatus(true));
	};

	// Subscribe to connection error event
	Connector.ConnectionError += error => this.GuiAsync(() =>
	{
		ChangeConnectStatus(false);
		MessageBox.Show(this, error.ToString(), LocalizedStrings.ErrorConnection);
	});

	// Subscribe to disconnection event
	Connector.Disconnected += () => this.GuiAsync(() => ChangeConnectStatus(false));

	// Subscribe to error event
	Connector.Error += error =>
		this.GuiAsync(() => MessageBox.Show(this, error.ToString(), LocalizedStrings.Str2955));

	// Subscribe to market data subscription failure event
	Connector.SubscriptionFailed += (subscription, error) =>
		this.GuiAsync(() => MessageBox.Show(this, error.ToString(),
			LocalizedStrings.Str2956Params.Put(subscription.DataType, subscription.SecurityId)));

	// Subscriptions for data reception

	// Instruments
	Connector.SecurityReceived += (sub, security) => _securitiesWindow.SecurityPicker.Securities.Add(security);

	// Tick trades
	Connector.TickTradeReceived += (sub, trade) => _tradesWindow.TradeGrid.Trades.TryAdd(trade);

	// Orders
	Connector.OrderReceived += (sub, order) => _ordersWindow.OrderGrid.Orders.TryAdd(order);

	// Own trades
	Connector.OwnTradeReceived += (sub, trade) => _myTradesWindow.TradeGrid.Trades.TryAdd(trade);

	// Positions
	Connector.PositionReceived += (sub, position) => _portfoliosWindow.PortfolioGrid.Positions.TryAdd(position);

	// Order registration failures
	Connector.OrderRegisterFailReceived += (sub, fail) => _ordersWindow.OrderGrid.AddRegistrationFail(fail);

	// Order cancellation failures
	Connector.OrderCancelFailReceived += (sub, fail) => OrderFailed(fail);

	// Set market data provider
	_securitiesWindow.SecurityPicker.MarketDataProvider = Connector;

	try
	{
		if (File.Exists(_connectorFile))
		{
			var ctx = new ContinueOnExceptionContext();
			ctx.Error += ex => ex.LogError();
			using (new Scope<ContinueOnExceptionContext>(ctx))
				Connector.Load(_connectorFile.Deserialize<SettingsStorage>());
		}
	}
	catch
	{
	}

	ConfigManager.RegisterService<IExchangeInfoProvider>(new InMemoryExchangeInfoProvider());

	// Register adapter provider for graphical configuration
	ConfigManager.RegisterService<IMessageAdapterProvider>(
		new FullInMemoryMessageAdapterProvider(Connector.Adapter.InnerAdapters));
}
How to save and load settings for Connector to a file can be found in the section Saving and Loading Settings.
Information about creating your own Connector can be found in the section Creating Your Own Connector.
Order placement is described in the sections Orders, Creating a New Order, Creating a New Stop Order.